Up and running in minutes.
From unboxing to your first call in under five minutes.
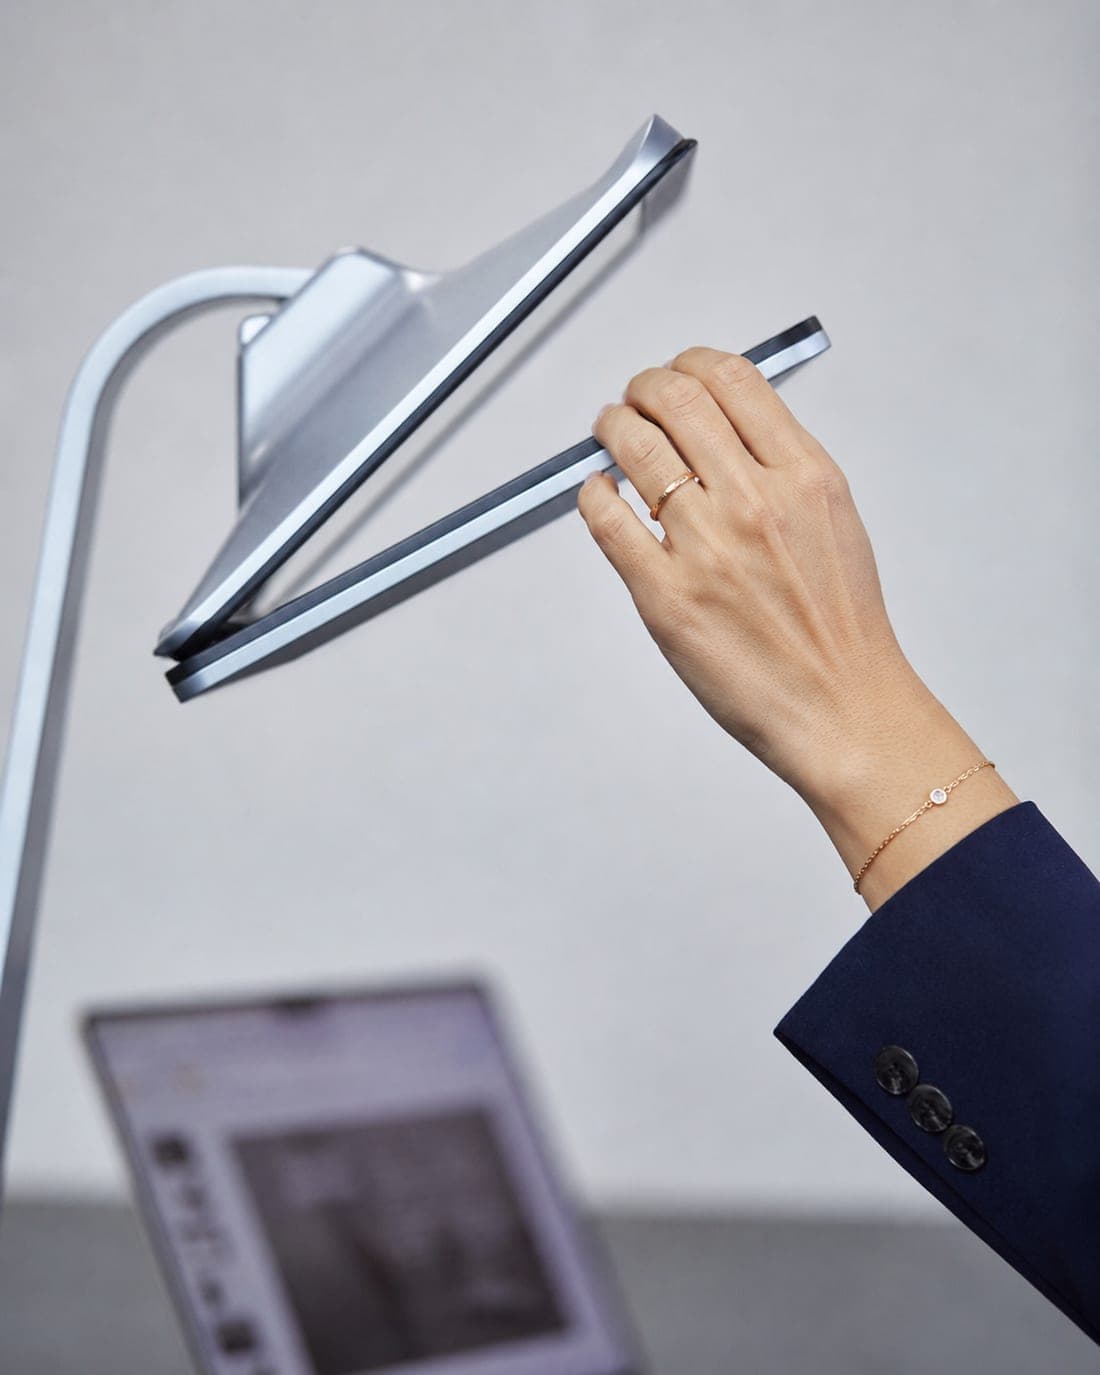
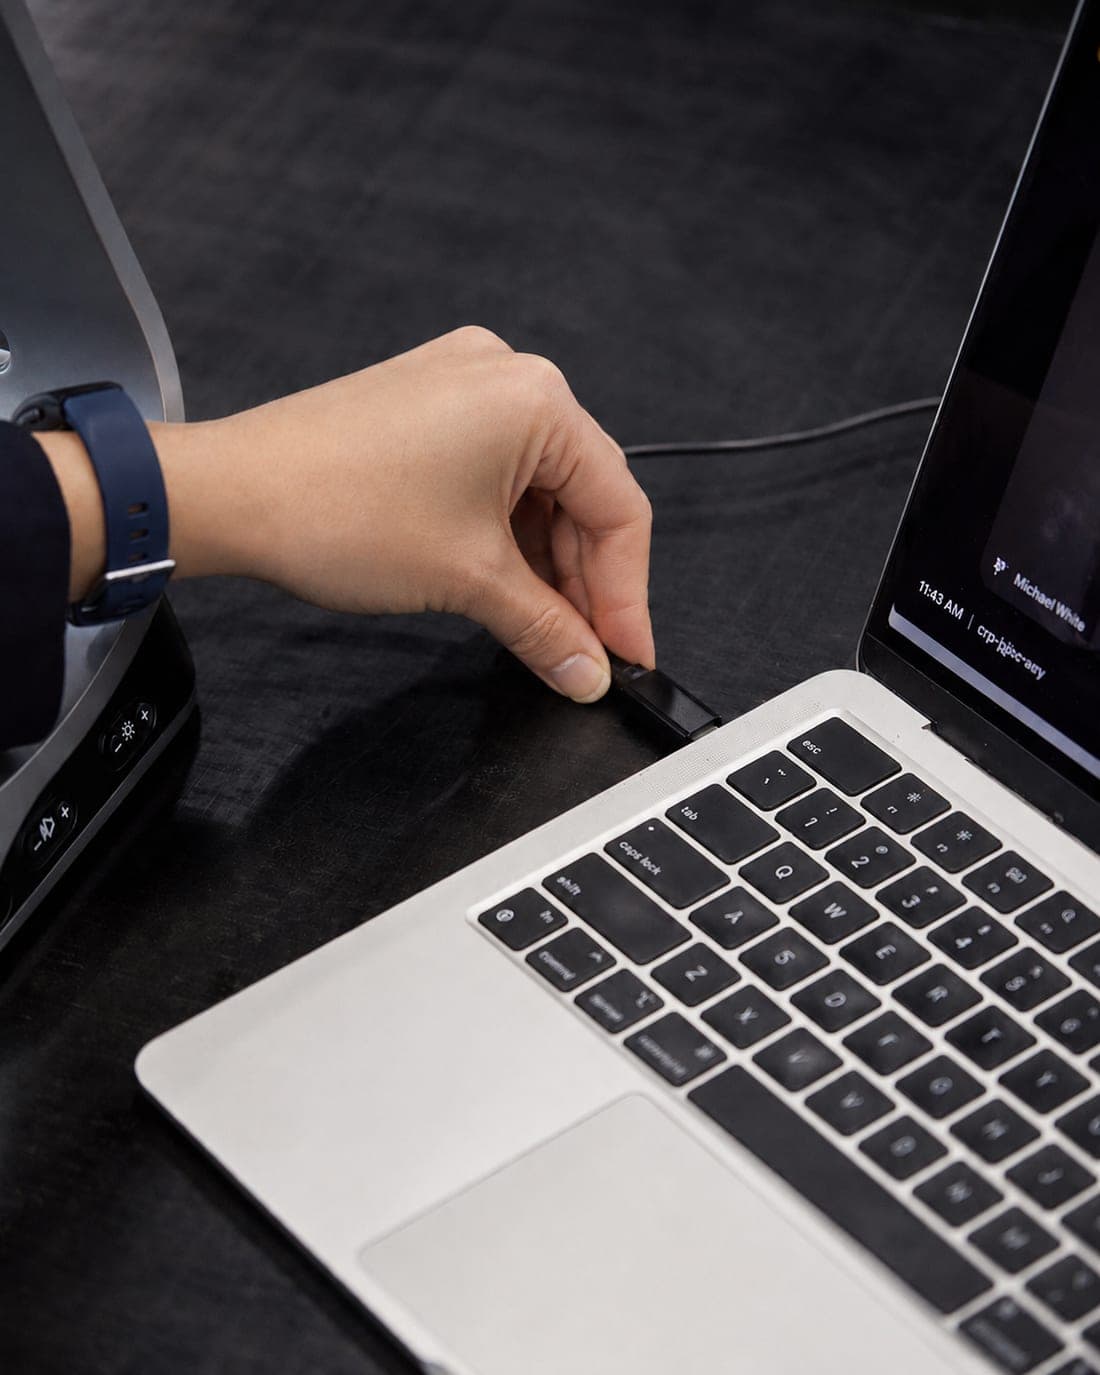
Open & Connect
Gently pull the bottom LCD display down using the tabs on either side until it rests horizontally. Connect the power cord to the '12V 6A' port on the rear panel. Then plug the USB-C cable into the 'AV-IN' port and connect the other end to your computer. USB-C carries camera, display, and audio signal. External power is required.
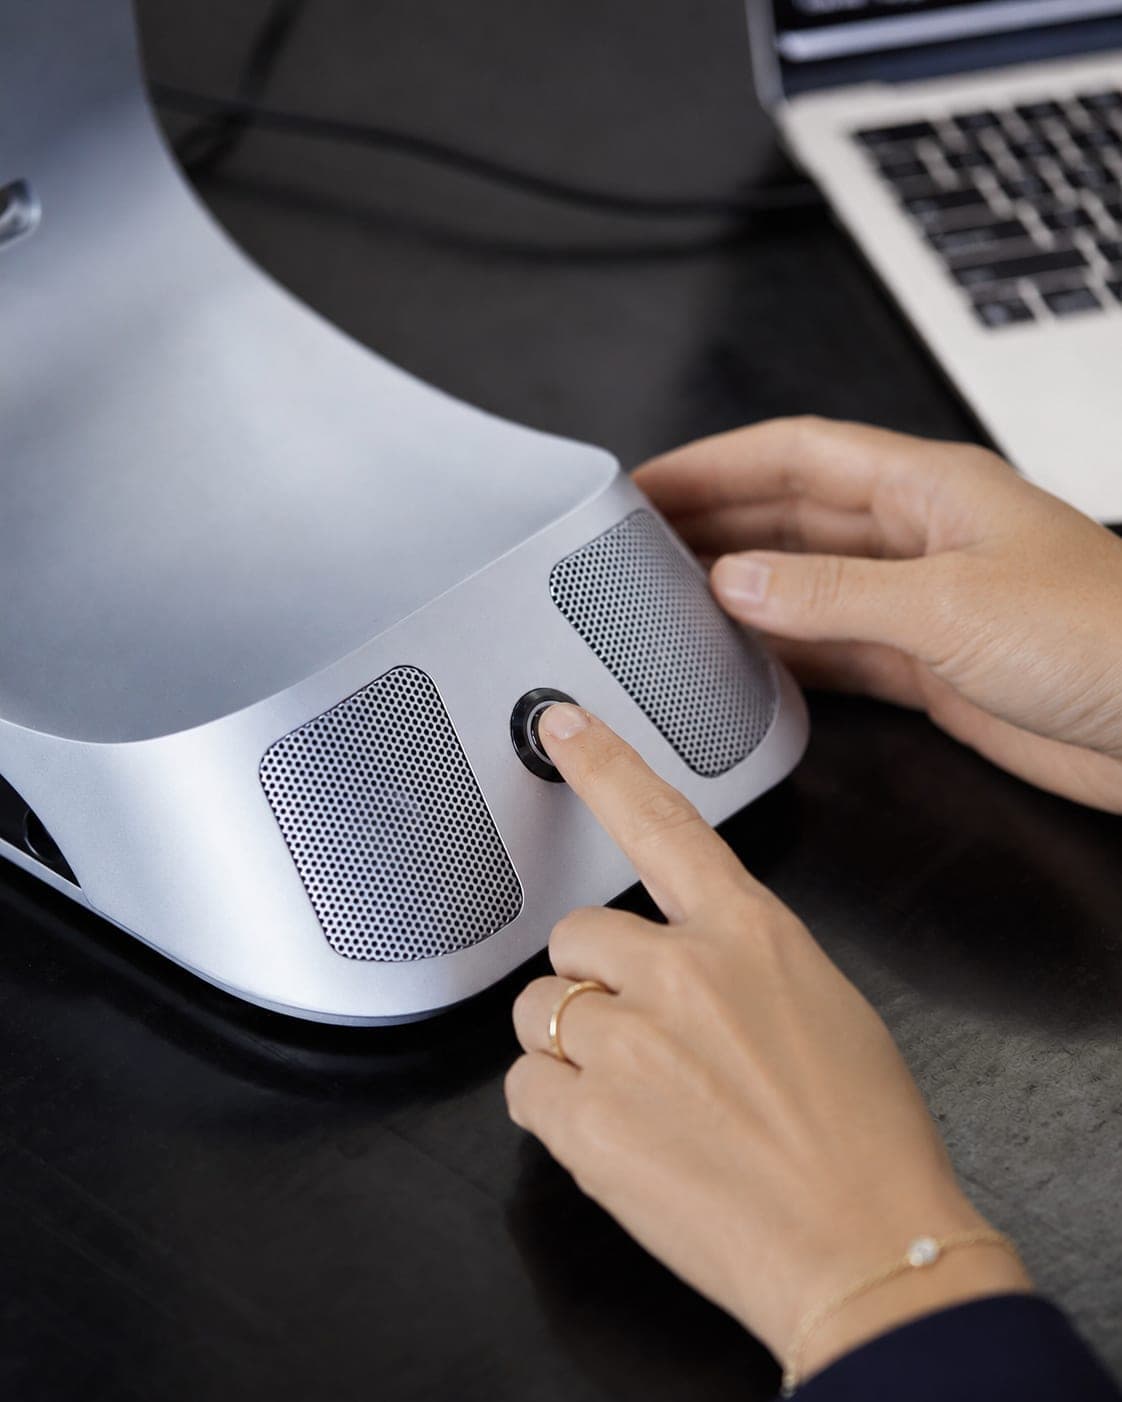
Power On
Long press the power button for about five seconds. The button turns blue when iVi is on. Your computer will detect iVi as a new display, camera, and audio device.
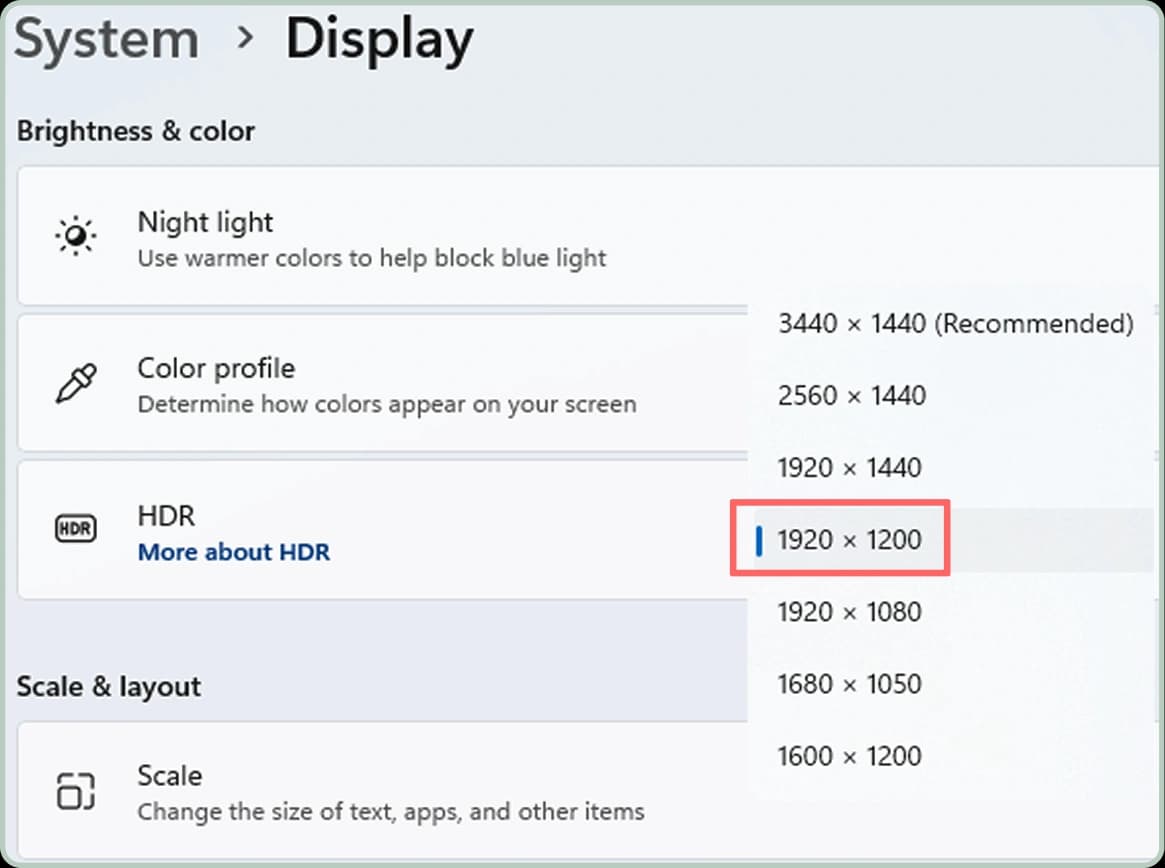
Configure Your Display(first use only)
Open your display settings and find the new monitor (it may appear as 'No Monitor'). Set the resolution to 1920 x 1200. On Windows, select 'Extend these displays.' On macOS, go to System Settings, then Displays, and arrange iVi beside your main display. You only need to do this once.

Lights, Camera, Action
Open Zoom, Teams, Google Meet, or your preferred platform. Select 'iVi Camera' for video and 'iVi Audio' for microphone and speakers. Swipe your hand under the light sensor to adjust the built-in lighting. You're ready for your first call with true eye contact.
Unboxing
What's in the Box
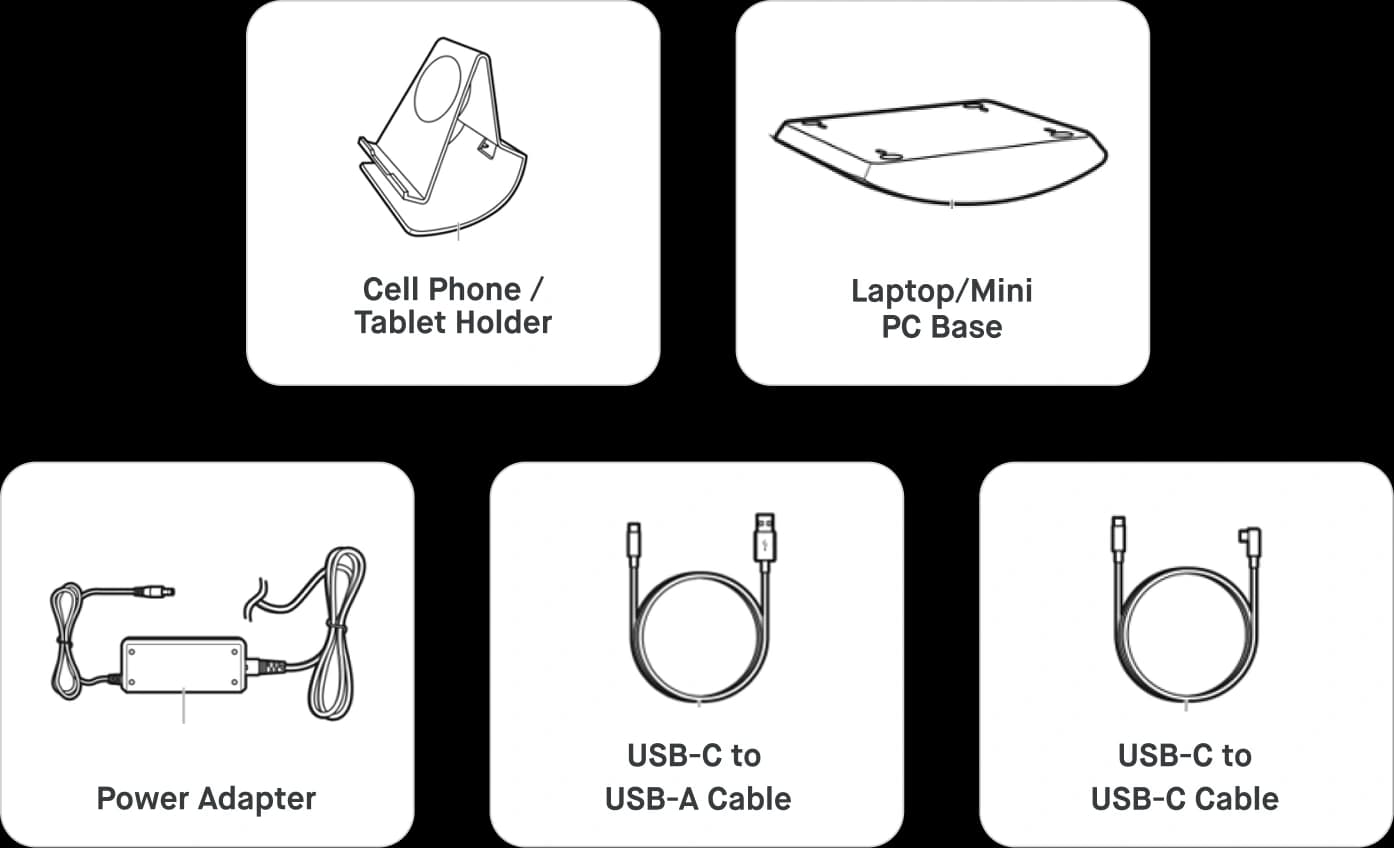
Cables and Accessories
Cell phone/tablet holder, laptop/mini PC base, power adapter, USB-C to USB-A cable, USB-C to USB-C cable

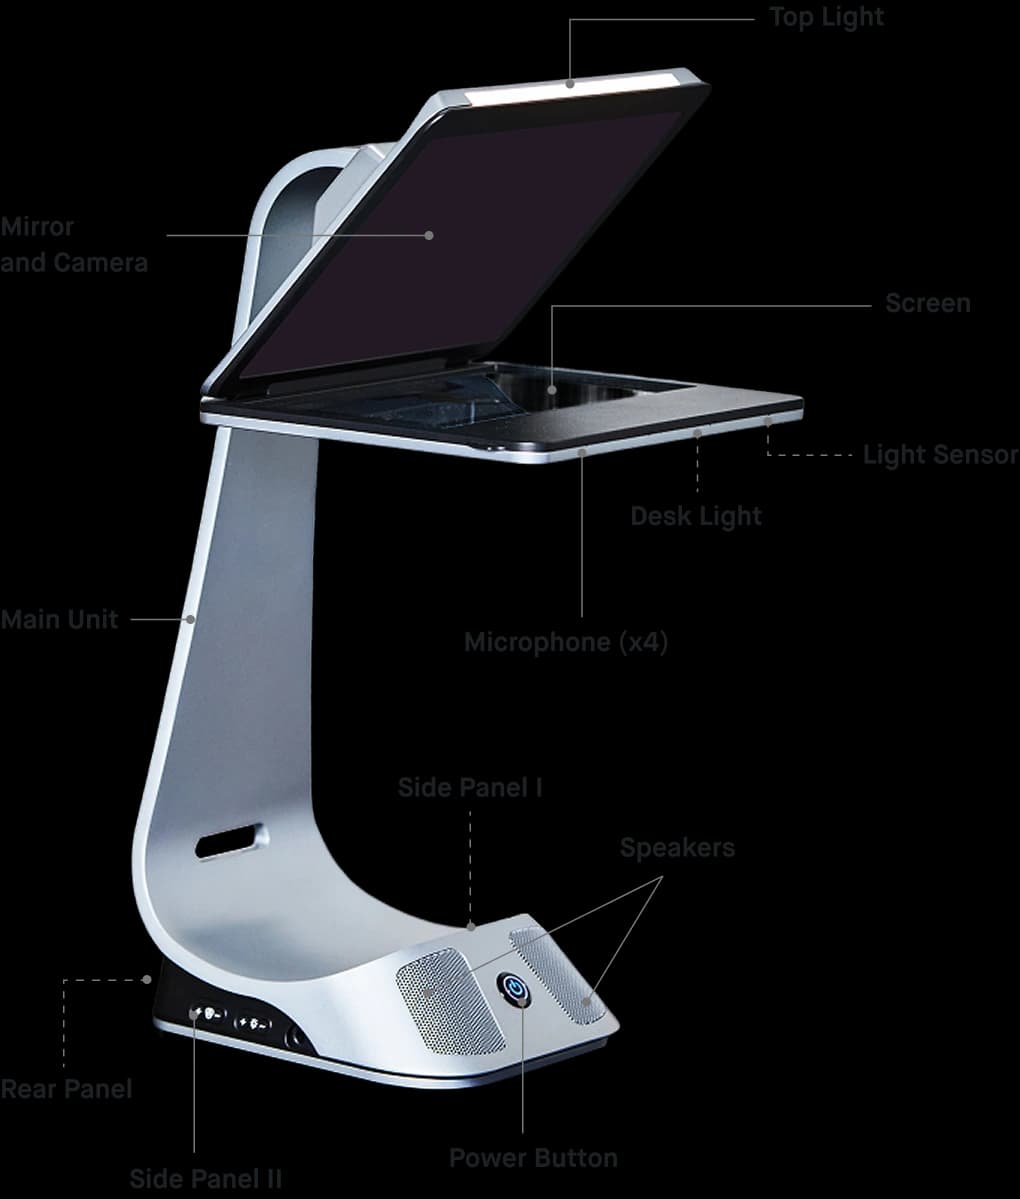
Side Panel I
Speaker volume and screen brightness controls
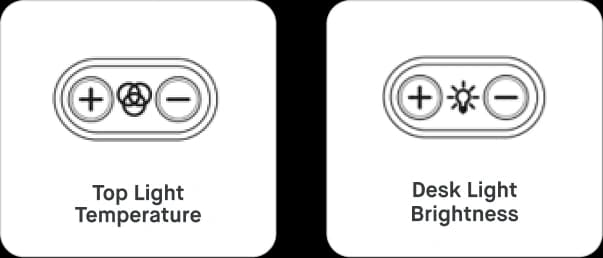
Side Panel II
Top light temperature and desk light brightness controls
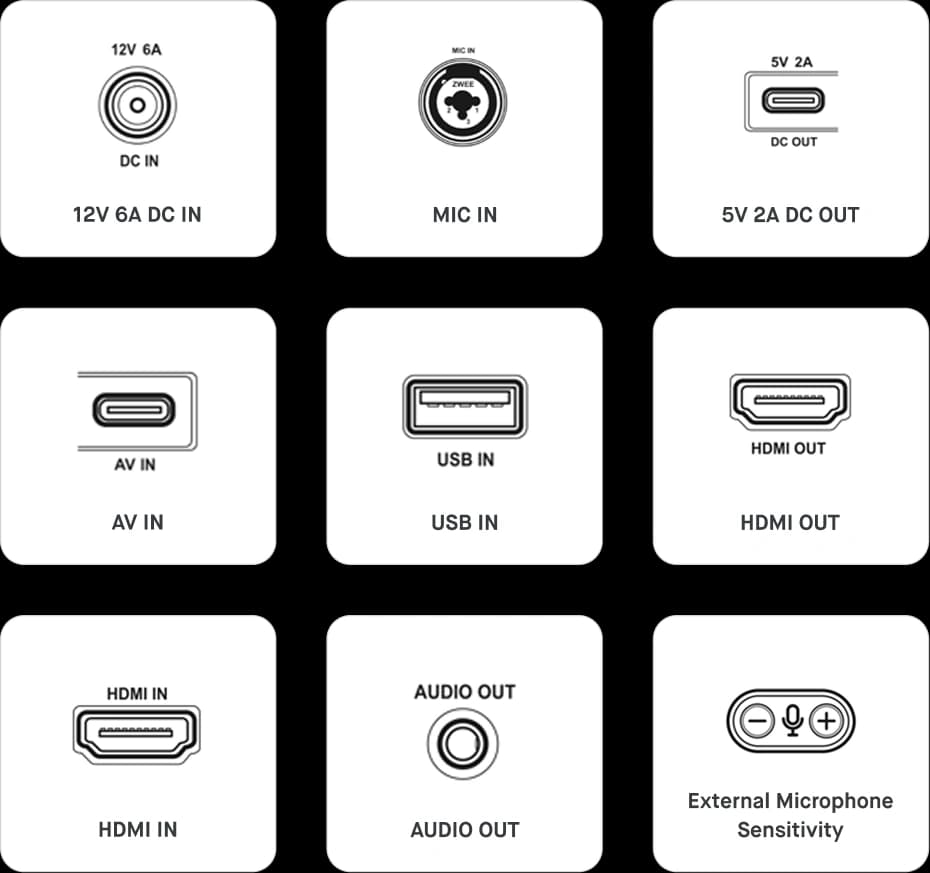
Rear Panel
12V 6A power port, AV-IN (USB-C), and HDMI IN
Troubleshooting
Platform-specific setup.
Most users are up and running immediately. If you need help configuring iVi for your specific operating system, follow the steps below.
Windows Display Setup
- 1With iVi on and connected, right-click on the desktop and select Display settings.
- 2Select Extend these displays from the multiple displays dropdown.
- 3Select the iVi display (it may appear as display 2) and set the resolution to 1920 x 1200.
- 4Set text scaling to 150% or 175% to enlarge the text on iVi's display.
- 5Rearrange displays so iVi is positioned next to your main monitor.
Resources
Everything you need.
Software
Download IVICAM.
IVICAM is optional but recommended. It gives you fine control over image quality, camera settings, and virtual camera output.
Advanced
IVICAM fine-tuning.
Most users won't need to adjust these settings. IVICAM handles optimization automatically. But if you want precise control, here's what's available.
Image Control
Adjust core image processing settings for your environment.
- Brightness
- Contrast
- Exposure
- White Balance
- Hue
Camera Control
Fine-tune camera positioning and compensation.
- Zoom
- Pan
- Focus
- Tilt
- Backlight Compensation
FAQ
Common questions.
Need help?
Our team is here to help you get the most out of iVi. Reach out anytime.